JavaScript Extensions (OnLoadScript)
Home –> AgileDialogs design guide –> Javascript Extensions
Process modeler can add JavaScript code in order to extend AgileDialogs default behavior.
AgileDialogs page includes a reference to jQuery 1.9, so jQuery can be used while adding code to AgileDialogs.
To add code to a Dialog click On Load Script in AgileDialogs form window:
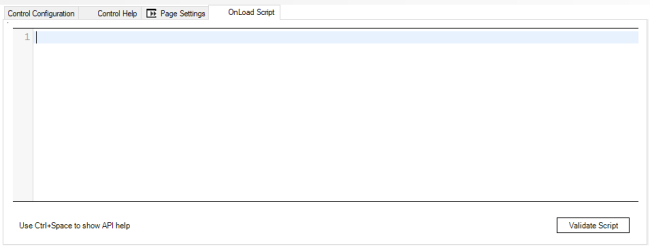
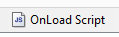
When the current form has a script set, the tab item shows an icon to indicate this.
Doing so the script editor is opened to include custom code:
The code included in this window is executed after the form has been loaded in the client.
Using context variables in OnLoadScript
The values selected in other pages by the user can be accessed using the values of customs attributes directly in OnLoadScript:
 var contextValue = "${attrName}";
 // user code ...
Get Control Value
To get a control’s value, use this code:
DialogsEngine.getSelectedValue(<controlName>);
Where:
controlName is the value ofValueVariableparameter in the target control.
If the control is mapped to data (for instance in a Grid control), this method will return the value of the column that is mapped to the Value Variable.
Get Display Value
To get a control’s display value, use this code:
DialogsEngine.getDisplayValue(<controlName>);
Where:
controlName is the value ofValueVariableparameter in the target control.
If the control is mapped to data (for instance in a Grid control), this method will return the value of the column that is mapped to the Display Variable.
Get and set question label
To get a control’s label, use this code:
DialogsEngine.getLabel(<controlName>);
Where:
controlName is the value ofValueVariableparameter in the target control.
To set a control’s label, use this code:
DialogsEngine.setLabel(<controlName>, <value>);
Where:
controlName is the value ofValueVariableparameter in the target control.
value is the value to set in control´s question label. Value can be a literal string or HTML content as string.
Change Control Value
To change a control’s value, use this code:
DialogsEngine.setSelectedValue(<controlName>, <newValue>);
Where:
controlName is the value ofValueVariableparameter in the target control.
newValue is the value to set.
Check if a control is read-only
Through the API, it is possible to check if a control is set to read-only or editable.
This would be the method to use:
DialogsEngine.isReadOnly(<control>);
Where:
control, is the control that we want to check
Returns true or false, depending on the read-only property of the control
Toggle a control read-only property
The Engine API allows us to modify the read-only property of a control at Runtime.
In order to perform this, this code should be added:
DialogsEngine.setReadOnly(<control>,<value>);
Where:
control, meaning the control we want to modify.
value, true to convert the control to read-only, false otherwise.
Enable/disable a control
To enable/disable a control, use this code:
DialogsEngine.disable(<controlName>); // Disable

DialogsEngine.enable(<controlName>); // Enable
Where:
controlName is the value ofValueVariableparameter in the target control.
Also, we can use the setEnabled method as such:
DialogsEngine.setEnabled(<controlName>, <isEnabled>);
Where:
controlName is the value ofValueVariableparameter in the target control.
isEnabled Boolean value, true to enable control, false to disable control.
If a control is disabled, its validation event is not fired. So say, it is Required or has a RegEx, these will not be executed and are ignored.
Hide/Show controls
To hide or show a control and its caption, add this code:
DialogsEngine.setVisible(<controlName>, <isVisible>);
Where:
controlName is the value ofValueVariableparameter in the target control.
isVisible Boolean value, true to show control, false to Hide control.
If a control is hidden, its validation event is not fired. So say, it is Required or has a RegEx, these will not be executed and are ignored.
Subscribe to control value changes
In order to manage value changes in a control this code must be added:
    DialogsEngine.addChangeEventHandler(<controlName>, function (value,display){
        // user code ...
    });
Where:
controlName is the value ofValueVariableparameter in the target control.
Add options to a selection control
To add an option to a combo, radio or checkbox control, add this code:
DialogsEngine.addOption(<controlName>, <newOptionDisplay>,<newOptionValue>, <index>);
Where:
controlName is the value ofValueVariableparameter in the target control.
newOptionDisplay is the display value of the new option.
newOptionValue is the value of the new option.
index is the list index in which we want to add the new value.
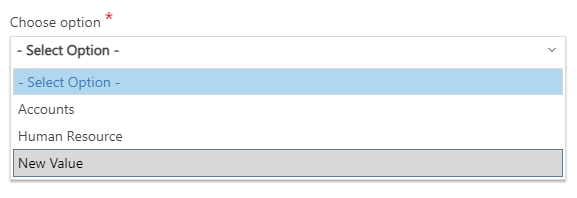
The new item would be shown on screen immediately (picture below):
Examples:
/* Adds a new option to "option_1" control */
DialogsEngine.addOption("option_1", "New Value","NV");
/* Adds a new option to "option_1" control at the first psotion in the list */
DialogsEngine.addOption("option_1", "New Value","NV", 0);
Remove options from a selection control
To remove an option from a combo, radio or checkbox control, add this code:
DialogsEngine.removeOption(<controlName>, <optionValue>);
Where:
controlName is the value ofValueVariableparameter in the target control.
optionValue is the value of the option to remove.
Inter-Control dependency
A control’s value can depend on the value of other control(s) by registering it as such:
DialogsEngine.register("sourceComboControl", "targetComboControl");
Where:
sourceComboControl is the name of the control that triggers the change.
targetComboControl is the name if the subcribed control.

Optionally, we can specify a callback function to execute:
Example: Add an option to the target combo control when register invoke ends:
DialogsEngine.register("sourceComboControl", "targetComboControl",
    function (source, target){
        DialogsEngine.addOption(target, "-- Choose value --", "");
        DialogsEngine.setSelectedValue(target, "");
});

Important: Use of the register method implies an http(s) call to the AgileDialogs server.
Note: If the source control allows multiple selections (checkbox, XRM Grid), the query in the target control should cater for it using operator IN or NOT IN.
Check if a control has a value
Through the API, it is also possible to know if a control to be filled in has already a value in runtime. The method to do so would be the following one:
DialogsEngine.hasValue(<control>);
Where:
control is a control that can contain a value at runtime.
Returns:
true if the control is filled in with a value, false otherwise.
Add custom validation for a single control
JavaScript code can be added to validate control values. To do that subscribe to form validation event and the event handler will be called when the validation is performed by AgileDialogs engine.
If validation is not OK return a string with the message that will be presented to the user. Successful validations must return an empty string.
In order to subscribe to validation events add this code:
DialogsEngine.addCustomValidation( <key>,<control>, <function>,<message>);
Where:
Key, is the validation key, can be any a unique string to identify the validation.
Control, is the value ofValueVariableparameter in the target control to apply the custom validation.
handler, is the function with the validation. If validation fails, this function must return a non empty string. If validation success, return an empty string.
Message [Optional], is the error message to be show if validation fail. If this parameter is ommited, the return ofhandlerparameter will shown as error message.
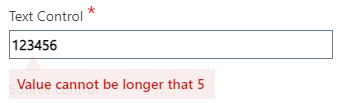
Example:
  // add custom validation to control called textControl

  DialogsEngine.addCustomValidation(
      "key1",
      "textControl",
      function (controlname, value, display){
        if (value.length > 5 ) return "error"
      },
      "Value cannot be longer that 5");
Also, we can return a localized string with the custom validation error message. To do this, first we must configure the CustomValidationMessage property of the control and use the location mechanism of AgileDialogs.
Once the property is configured and localized, we can use the DialogsEngine.getCustomValidationMessage (controlname) method to return the localized message.
DialogsEngine.getCustomValidationMessage(<controlname>);
  // add custom validation to control called textControl

  DialogsEngine.addCustomValidation(
     "key1",
     "textControl",
     function (controlname, value, display){
       if (value.length > 5 ) {
        return DialogsEngine.getCustomValidationMessage(controlname);
        }
     });
Add validation extensions for all controls in the page
You can add code to validate control values. To do that subscribe to form validation event and the event handler will be called when the validation is performed by AgileDialogs engine.
If validation is not OK return a string with the message that will be presented to the user.
In order to subscribe to validation events add this code:
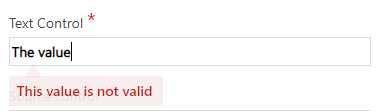
  // add validation to control called textControl

  function myValidationFunction(controlName, controValue){
      if(controlName == "textControl"){
          // Add your validation logic
          return "This value is not valid";
      }
  }
  validationHandler.addHandler(myValidationFunction);
addHandler method will add a handler to be called when controls are validated by AgileDialogs Runtime Engine. The method added (in this sample myValidationFunction) will receive 2 parameters:
Where:
controlName: Name of the control to be validated.
controValue: Current value of the control.
To show a validation message the validation function should return a string message.
Apply format to control
To apply custom format to a control use this code:
DialogsEngine.applyFormat(<controlName>,<format>);
Where:
controlName is the value ofValueVariableparameter in the target control. format is the format to apply to control. Can be:
- Valid JSON object. See http://api.jquery.com/css/
- CSS rule (the CSS rule must exists, see customization Guide).
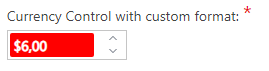
Example:
// apply custom format to currency control called currencyControl

var theFormat = {
    "color":"white", // css-property : value
    "background-color": "red" // css-property : value
};
DialogsEngine.applyFormat("currencyControl", theFormat);
Which will show as such at runtime:
Note: See Customization Guide
Apply conditional format to a control
To apply conditional format to a control add a change handler as such:
Example:
// apply contitional format to textcontrol
// depending on the value of a combo

var conditionalFormat = function (value, display){
    var format = { "color" : (value == "M" ? "blue" : "pink") };
    DialogsEngine.applyFormat("textControl", format)
};

DialogsEngine.addChangeEventHandler("gender", conditionalFormat );
Runtime:


Show/Hide Notes control
This is different to .toggleNotes() in the way that it hides the control totally, not just collapse it:
DialogsEngine.setNotesVisible(<value>);
Where:
value, true if we want the notes tab to be shown, false otherwise.

Collapse/Expand Notes control
Use to expand or collapse the Notes control using this code:
DialogsEngine.toggleNotes();
Get Notes content
To get content of the Notes programmatically.
In order to do so, this code should be added:
var myNotes = DialogsEngine.getNotes();
Append Notes content
To append to the content of the Notes programmatically.
In order to do so, this code should be added:
DialogsEngine.appendNotes(<notes>);
Where:
notes, stands for the literal we want to add to the note.
DialogsEngine.appendNotes("Add this to my notes");
Set Notes content
To set content of the Notes programmatically.
In order to do so, this code should be added:
DialogsEngine.setNotes(<notes>);
Where:
notes, stands for the literal we want to add as a note.
DialogsEngine.setNotes('New Notes added to our form');
Output:

Show a message window
To show a simple message window to user we need to use this code:
DialogsEngine.message(<title>, <message>);
Where:
title is the title of message window. message is the content of message window.
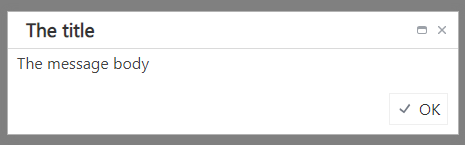
Example:
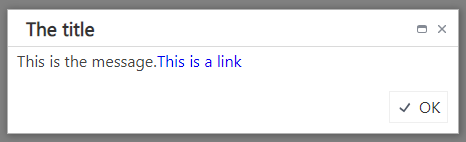
DialogsEngine.message("The title", "The message body");
Output:
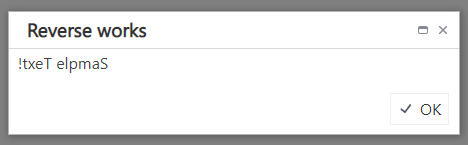
Show a formatted message window
To show a formatted message, use this code.
 var theMessage = "This is the message.<a href='\#'>This is a link</a>";
 DialogsEngine.message("The title", theMessage);
Output:
Enable/Disable the You are leaving the Page warning message
By default, if the user navigates away from the Page they would get a warning message.
This warning can be disabled using:
DialogsEngine.disableBeforeUnloadScript();
And re-enabled using:
DialogsEngine.enableBeforeUnloadScript();
Global validations
The Engine can be personalized and extended similar to the way that the visual aspects can be customized and extended.
It is recommended to use objects to encapsulate functions.
Example:
 var myCompanyUtils = {
     reverse: function (input) {
        return input.split("").reverse().join("");
     }
 }
Important: Errors in the custom code can cause the whole application to fail, given the way javascript works.
Errors in user custom code are NOT supported.
Modifications to the DOM are NOT supported.
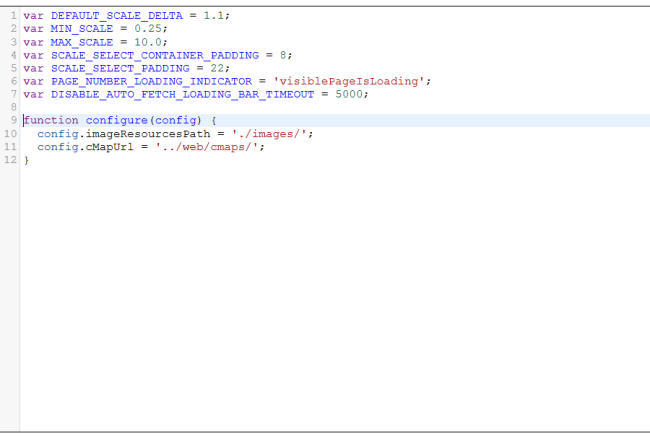
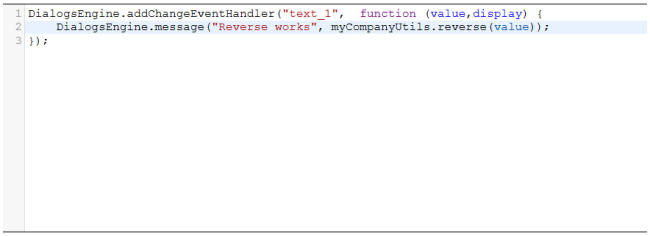
Once our code is in this file, we can use the OnLoadScript event to invoke our custom functionality:
 DialogsEngine.addChangeEventHandler("text1", function (value, display){
     DialogsEngine.message("Reverse works", myCompanyUtils.reverse(value));
 });
Enable / Disable a control for validation requirement
In a form, we have the possibility of setting a control as required. This means that, when moving to the next stage of our defined process, we will be stopped by the application if that control does not have its default value filled in.
However, we can customize this feature on runtime using the method setRequired.
In order to toggle on/off our required control validation, this code should be added:
DialogsEngine.setRequired(<control>, <value>, <message>);
Where:
control, stands for the control id that we want to customize.
value, true in case we want the control to be required or false in the opposite case.
message is the error message to be shown to request the user to fill in the required value for the control.
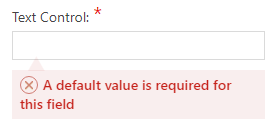
 // enable validation to control called textbox_1

 DialogsEngine.setRequired("textbox_1", true, "A default value is required for this field");
Output:
In the opposite case (setting the value to false) we would not need to set any message, so we can leave out the message parameter from the function:
DialogsEngine.setRequired("textbox_1",false);
Set a regular expression in a control to be validated
We also can set an advanced validation pattern on our controls in order to control the correct format or our fields’ content.
In order to perform the advanced control validation, this code should be added:
DialogsEngine.setRegularExpression(<control>, <regularExpression>, <message>);
Where:
control, stands for the control id that we want to customize.
regularExpression, string that conforms the regular expression.
message is the error message to be shown to request the user to fill in the required value for the control.
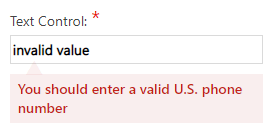
Example (we are setting a text field to be validated as an US phone number):
DialogsEngine.setRegularExpression(
    "textbox_1",
    "\^(\\([0-9]{3}\\)\|[0-9]{3}-)[0-9]{3}-[0-9]{4}\$",
    "You should enter a valid U.S. phone number");
Arrange a custom set of actions before every navigation callback
We could want the application to perform a custom set of actions or message before every callback (e.g. everytime we press next to move from a process stage to another we could want to show a predefined message to the user, etc.)
In order to perform this set of actions, we can define a custom function with our desired commands / steps, loading this predefined method onto the OnLoad Script:
DialogsEngine.beforeNavigate(<function>);
Where:
function, stands for the function that we want to pass as a parameter. This anonymous function will contain the commands to be performed before every navigation inside the process.
Example (we want to show an informative message to the user everytime we press next on our form and move forward inside the main process flow):
DialogsEngine.beforeNavigate(function () {
    window.alert ('Form process finished. Moving to the next step...');
});
Set custom variables or methods for the initial Form Load
We could probably need to set some special variables or methods that we want on our application due to special needs or requirements. For that reason, the Engine method addStartHandler would be useful to that purpose.
In order to perform this, this code should be added:
DialogsEngine.addStartHanlder(<function>);
Where:
function, stands for the anonymous function which will contain the routine or custom functionality that we want to add our process.
Things are going to be clearer using one example. For this example, we need to load a logo URL that will be placed on a form inside our process, inside an element already created and called logoContainer. For that goal, we already have a defined variable that contains the URL address:
 DialogsEngine.addStartHandler(function () {

    // Accesing the already created variable, containing the logo url
    var url =DialogsEngine.getDialogContextValue("logoBaseUrl");

    // now we are setting our image to be shown on our container "logoContainer",
    // on the initial loading of the page.
    $("#logoContainer").css("background-image", "url(" + url + ")");

   });
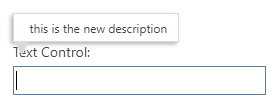
Arrange a new Description literal for our controls
If we want to add or update a previous tooltip description that is being shown when positioning on a page control, we can do so by using the predefined engine method setDescription.
DialogsEngine.setDescription(<control>,<description_value>);
Where:
control, is the control that we want to modify description_value, is the new message that we want for our control to be shown when changing the focus on it.
DialogsEngine.setDescription("text_2","this is the new description");
Output
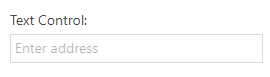
Set a watermark literal inside our text controls
The Dialogs Engine gives us the possibility of setting a description watermark to help the process users to identify the text inputs functionality.
To do so, this code should be added:
DialogsEngine.setWatermark(<control>, <literal>);
Where:
control, stands for the control id that we want to customize.
literal, string that conforms the literal we want to appear on the control
Example (we are setting a description text to be shown on a textbox called text_1 :
DialogsEngine.setWatermark("text_1", "Enter address");
Find out if a control exists
There is an Engine method for checking if a control exists, passing its Id as a parameter. We will be receiving a true value in case it exists, false otherwise.
To do so, this code should be added:
DialogsEngine.exists(<control>);
Where:
control, stands for the id of the control we want to look for.
Returns:
true if the control exists, false otherwise.
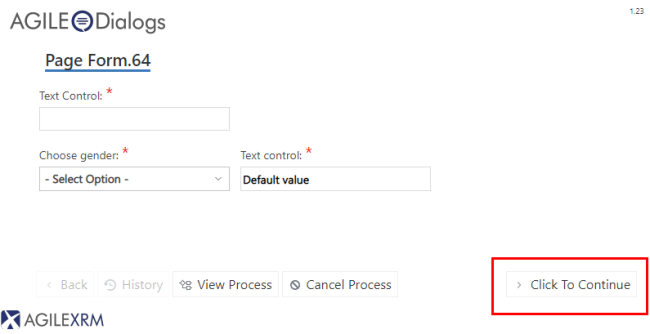
Change the text of the Next button
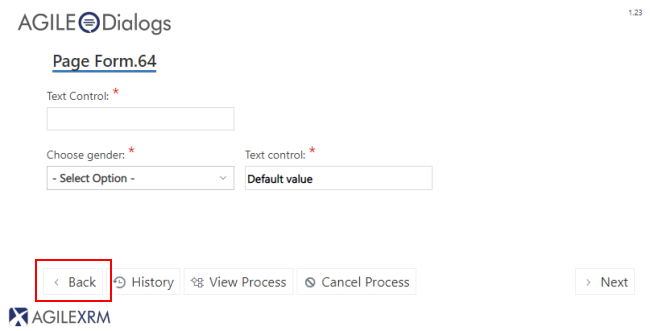
If we want to change the text of the predefined Next button inside a form (picture below), we have a method using the Engine that covers that functionality.
DialogsEngine.setNextButtonText(<value>);
Where:
value, text that we want to set as the caption for the next button.

The result will be immediately updated on AgileDialogs Next button, showing the new caption:
DialogsEngine.setNextButtonText("Click To Continue");
Output:
Change the text of the Back button
If we want to change the text of the predefined Back button inside a form (picture below), we have a method using the Engine that covers that functionality.
DialogsEngine.setBackButtonText(<value>);
Where:
value, text that we want to set as the caption for the back button.
The result will be immediately updated on AgileDialogs Next button, showing the new caption:
DialogsEngine.setBackButtonText("Click To Back");
Output

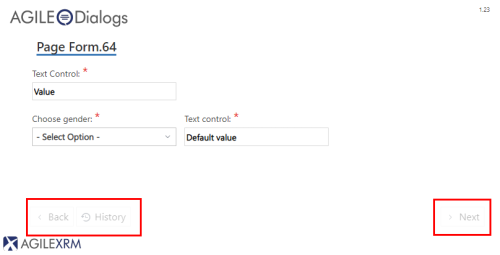
Disable / Enable the Form navigation buttons and commands
Sometimes, could be useful to make the user wait in a form, until a certain set of information or requirements have been satisfied (getting data from a service, perform some custom validations, etc…). For that goal, the API engine has two methods available for enabling / disabling the predefined Form buttons (Back, History, Next…). It also disables the keyboard commands that perform the same functionalities.
In order to disable them:
DialogsEngine.off();
It has an immediate effect over the buttons. To get the opposite effect, the engine command is:
DialogsEngine.on();
Moving forward and backwards
In a defined process, we could move through its different stages using the Next and Back buttons. But we also can achieve the same results programmatically, using the DialogsEngine API.
In order to do so, this code should be added:
   DialogsEngine.next(); //moves forward to the next Page in our dialog
   DialogsEngine.back(); //moves backwards to the previous Page in our dialog
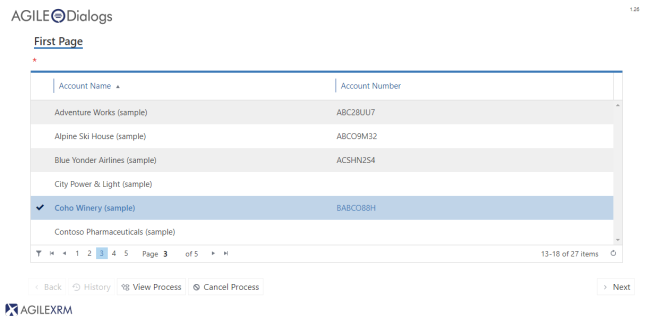
Get all the data of the selected Control
In complex controls (like a Grid), we could want to get all the information about the item or items (if any) that we have selected. There is a way to do that using DialogsEngine API (meant to be used against Grid controls):
DialogsEngine.getSelectedDataItem(<control>);
Where:
control, stands for the control id that we want to collect the selected data from.
/*
  we want to know all the inner details about the selected item chosen by the user,
  inside a grid called guid_1
*/

var result = DialogsEngine.getSelectedDataItem("guid_1");
console.log(result);
Console will show us all the details about the selected row as JSON object.
{
  "accountid":"{DC0DFC69-9654-E911-822F-00505637DF91}",
  "name":"Coho Winery (sample)",
  "accountnumber":"BABCO88H"
}
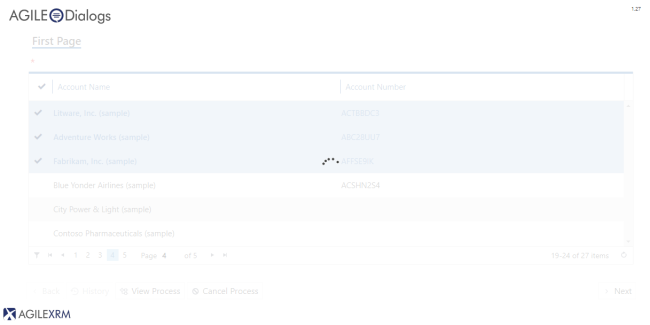
In case we have a Grid with its AllowMultipleSelection property set to true, we would also receive all the needed details for each selected row (Important: only for the current grid page being shown on screen):
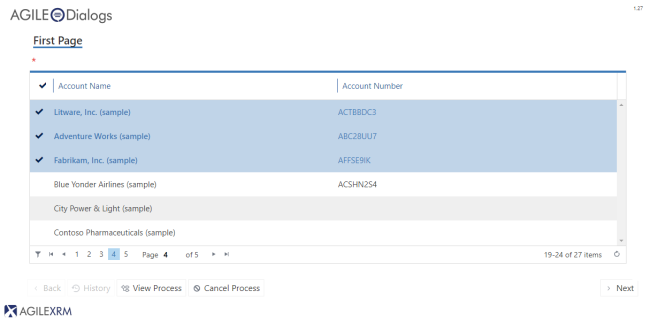
[
 {
   "accountid": "{CC0DFC69-9654-E911-822F-00505637DF91}",
   "name": "Litware, Inc. (sample)",
   "accountnumber": "ACTBBDC3"
 },
 {
   "accountid": "{CE0DFC69-9654-E911-822F-00505637DF91}",
   "name": "Adventure Works (sample)",
   "accountnumber": "ABC28UU7"
 },
 {
   "accountid": "{D00DFC69-9654-E911-822F-00505637DF91}",
   "name": "Fabrikam, Inc. (sample)",
   "accountnumber": "AFFSE9IK"
 }
]
In case no row is selected, we will receive a empty JSON object as the return value.
{
  "accountid":"",
  "name":"",
  "accountnumber":""
}
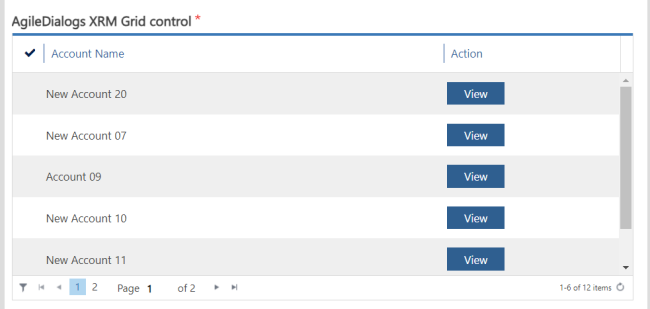
Add new conlumns to Grid controls
Sometimes we need to add a non-data columns to show indicators or customs buttons,customs views … to a AgileDialogs XRMGrid control.
DialogsEngine.addColumnToGrid(<control>, <column>);
Where:
control: Is the name of the control where the new column will be added.
column: A JSON object with the needed information to create the column, like this:
{
    field: "btn.action",
    title: "Action",
    template: "<div>html content</div>",
    width: "30%"
};
Example:
var theTemplate = '<button class="k-button k-primary">View</button>';
var column = {
    field: "btn.action",
    title: "Action",
    template: theTemplate,
    width: "30%"
};
DialogsEngine.addColumnToGrid("guid_1", column);
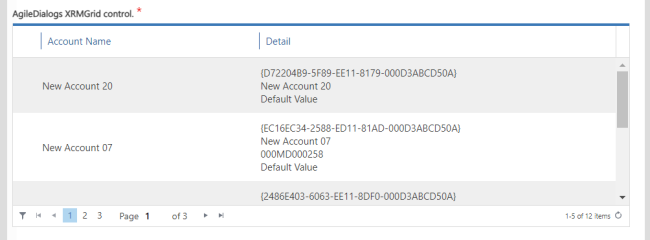
Defining the column template
In order to add new column to XRMGrid controls, its needed to build the column template.
It is the HTML content wich will be rendered in grid cell.
Templates offer a way to create HTML chunks that can be automatically merged with record data into rendered cell.
Templates use a hash-template syntax by utilizing the # (hash) sign for marking the areas that will be parsed.
The # (hash) sign allows you mark areas that will be replaced by data during the template execution.
To use the hash syntax, apply any of the following approaches:
- Render values as HTML (#= #).
- Use HTML encoding to display values (#: #).
Use:
#= XRMGRIDRECORDID # to get the recordID
#= Field1 # to get the first field of query
#= Field2 # to get sencond field of query
#= Field3 # to get thrid field of query
var theTemplate = '<div> #= XRMGRIDRECORDID # </div>' +
				  '<div> #= Field1 # </div>' +
				  '<div> #= Field2 # </div>' +
				  '<div> #= Field3 # </div>';
var column = {
	field: "cell.detail",
	title: "Detail",
	template: theTemplate,
	width: "60%"
};
DialogsEngine.addColumnToGrid("guid_1", column);
Set focus in a specific control
To set the focus in a specific control we should use this method:
DialogsEngine.setFocus(<control>);
Where:
control is the value of ValueVariable property of control.
Check if a control is required
In Design-time, we can configure if the controls inside a form are required to be completed before moving on to the next process stage. We also can know, in runtime, if a certain control is required or not, using the following API method:
DialogsEngine.isRequired(<control>);
Where:
control is the name of the control at runtime we want to know about.
Returns:
true if the control is required, false otherwise.
Show/hide page spinner
To show/hide the page spinner, use this code:
DialogsEngine.spinner(<value>);
Where:
value is a true/false expression. Use true to show the spinner and false to hide it.
Output:
Change the required fields default validation message for customized messages
When the user moves through the AgileDialogs forms sequence, the AgileDialogs runtime engine configures automatically some validation messages that pop up in case some required field has not been filled in (images below).
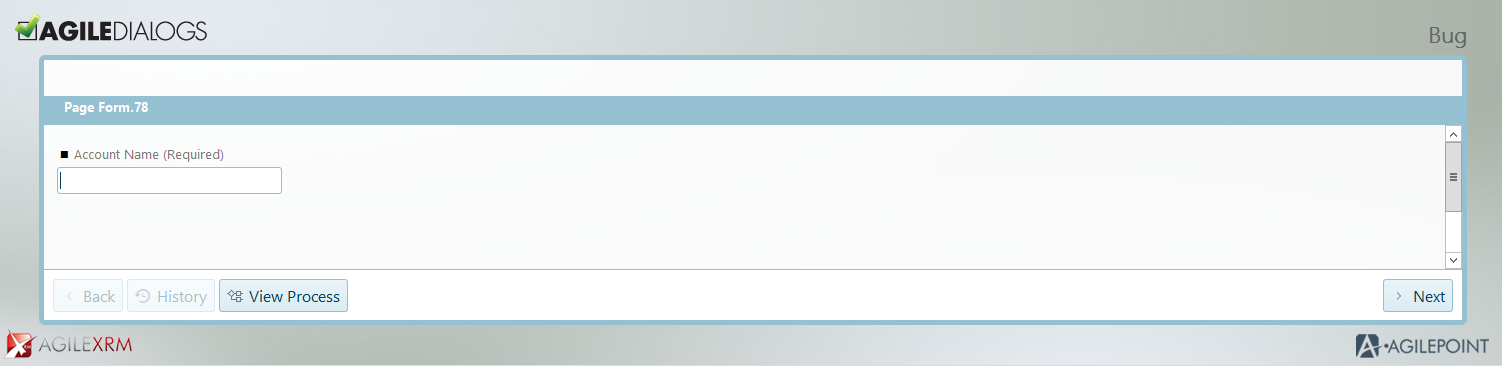
Figure 12. A required textbox is not filled in before pressing “Next”
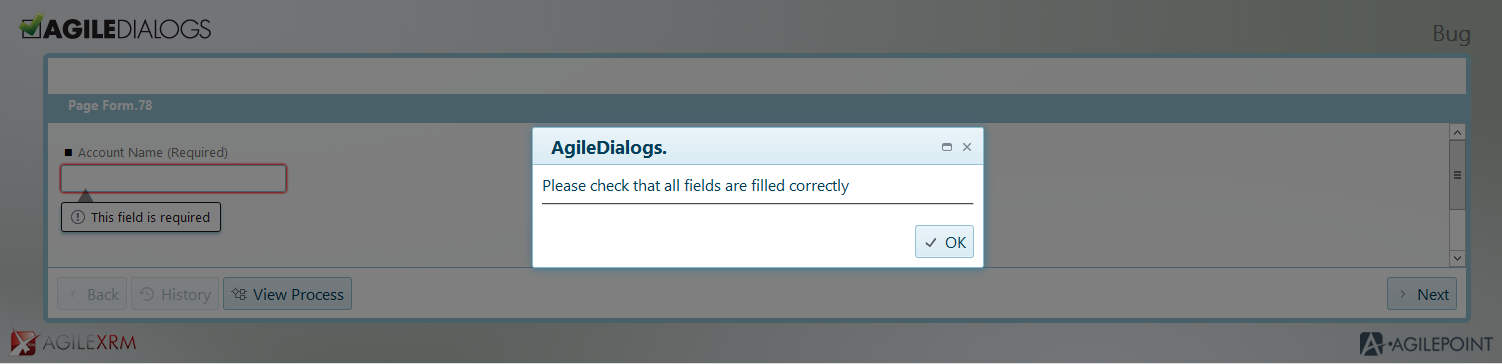
Figure 13. Default message shown when the required fields have not been filled in.
If we are interested in personalize the information message, we can customize it by following the steps detailed below.
AgileDialogs API contains two properties that can be tailored in order to change the message title and the message body contents. If we want to change these information for a particular page, we should:
Open AgileDialogs Designer, and click on OnLoad Script.
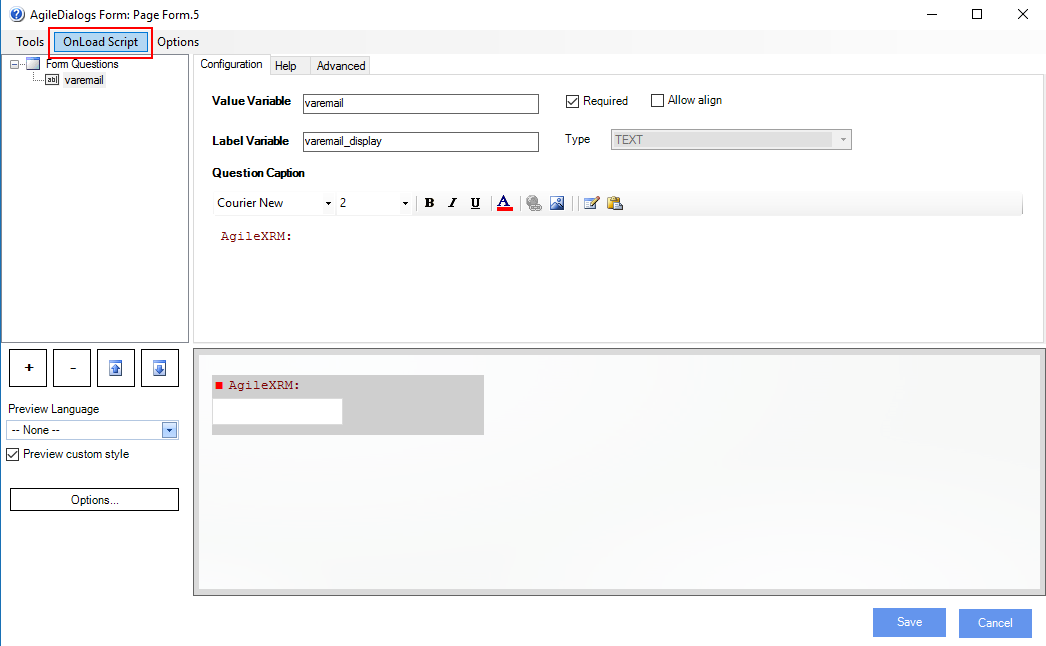
Manipulate the properties described below to change the messages:
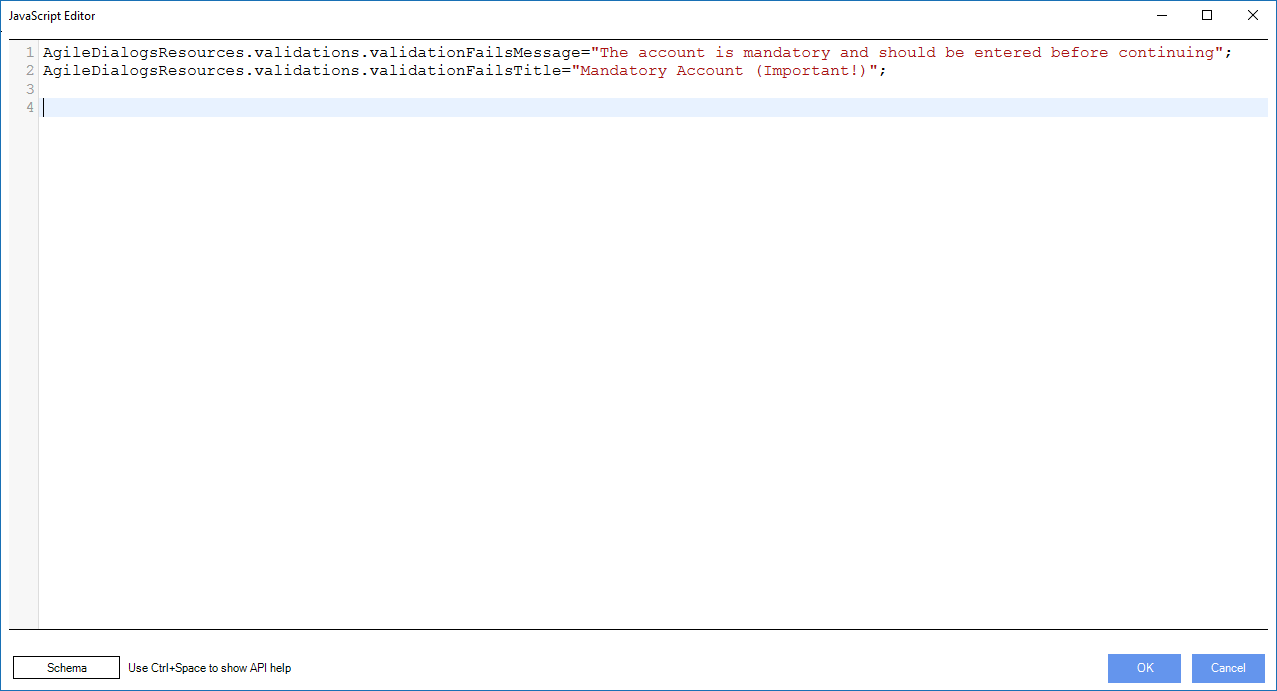
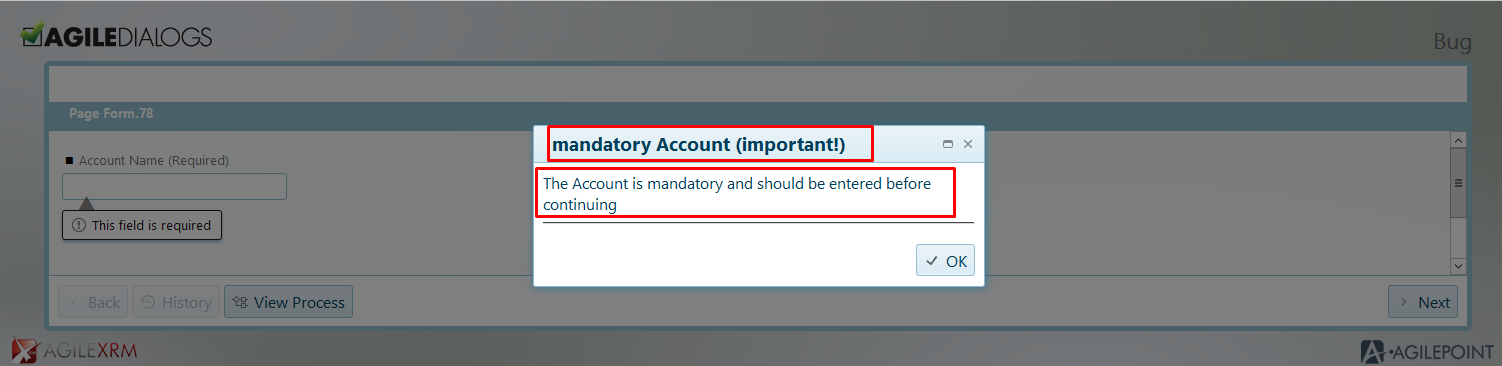
Once published, the page will show the desired messages when needed:
Create customized confirmation messages associated to events
Inside a Page form, sometimes it is necessary to warn or inform the user about the consequences of an action (choosing an item inside a combo, pressing a button, selecting a Grid’s element), moreover, if the information to show has to be specific, we need a method to perform that task. For that goal, use this code:
DialogsEngine.confirm(<title>,<message>,<confirmFunc>,<cancelFunc>, <okButtonText>, <cancelButtonText>);
Where:
title is a mandatory parameter. Represents the message title header that we want to show inside the confirm frame.
message is a mandatory parameter. Represents the message body that we want to show inside the confirm frame.
confirmFunc is a mandatory parameter. Represents the handler function in which we will group the action or actions that we want to perform when the user will press the OK button inside the confirm frame (explained in detail in the practical example below).
cancelFunc is an optional parameter. Represents the handler function in which we will group the action or actions that we want to perform when the user will press the Cancel button inside the confirm frame (explained in detail in the practical example below).
okButtonText is an optional parameter. Represents the text for the OK button of confirmation window.
cancelButtonText is an optional parameter. Represents the text for the Cancel button of confirmation window.
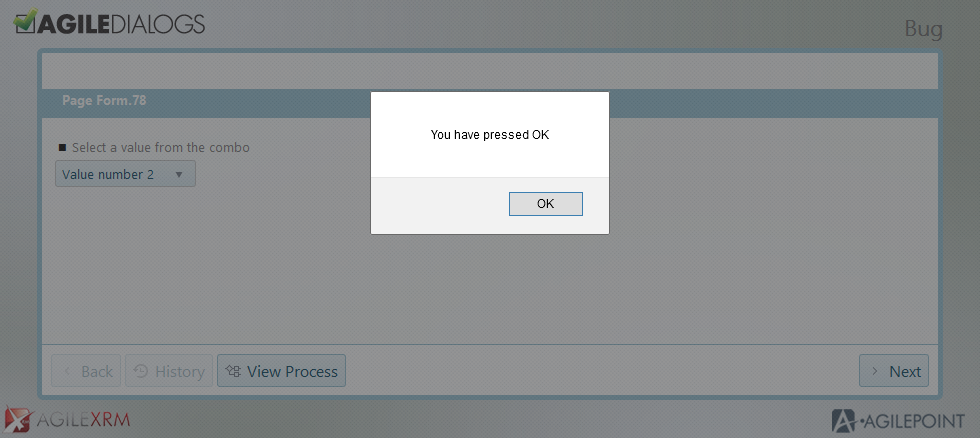
Example. Let’s suppose we have a Page form with a combo, which is composed of different values. We want to configure the page in a way that will warn us if we try to change the combo’s selected value.
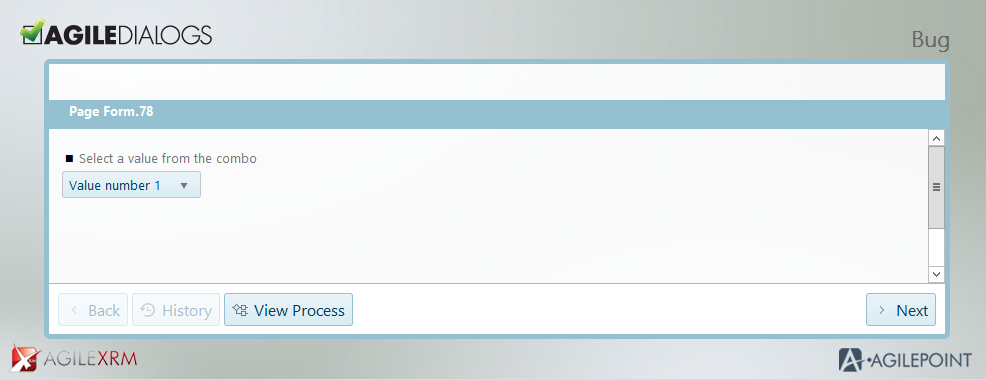
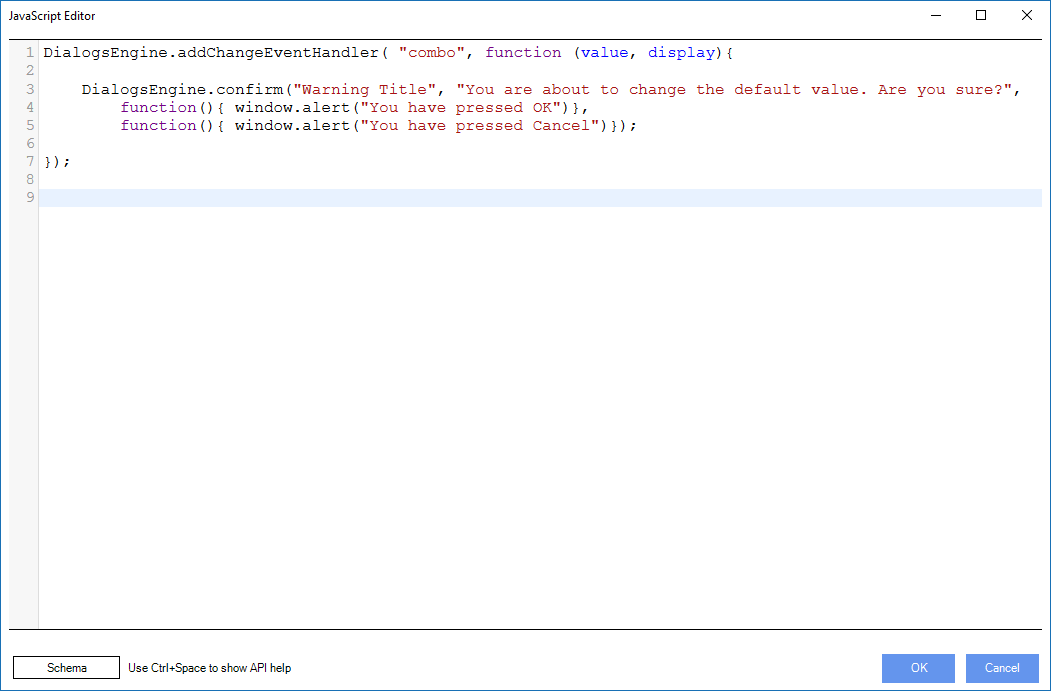
For that goal, we should open the OnLoad Task inside AgileDialogs designer, and type the following command (image below):
DialogsEngine.addChangeEventHandler( "combo", function (value, display){

    DialogsEngine.confirm("Warning Title", "You are about to change the default value. Are you sure?",
        function(){ window.alert("You have pressed OK")},
        function(){ window.alert("You have pressed Cancel")});

});
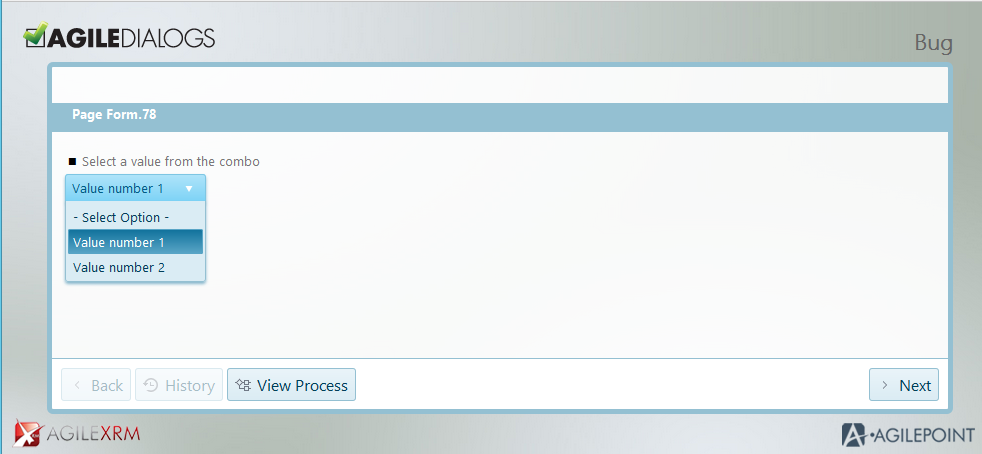
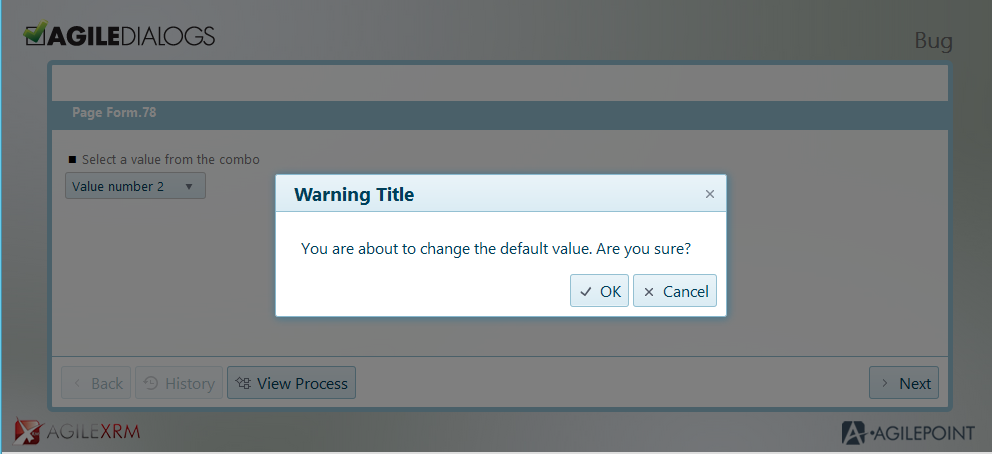
As we can see, when the combo changes its value, we have set a personalized confirmation message, composed of the title, the customized message, the message after the user has pressed OK and the analog message for the Cancel handler. The result (after such changes are published) is easy to see:
Check if a condition is true
DialogsEngine API has a feature that allows to check if a certain condition or property we are checking is returning a Boolean value or not. We may use this functionality for multiple purposes, and it is simple to implement.
DialogsEngine.bool(<value>);
Where:
value is a string literal that conforms a condition, property or value to be checked.
Returns: true if the value is true, True, TRUE or combination of upper/lowercase, false otherwise.
DialogsEngine.bool('True');
Check if variable contains value
DialogsEngine API has a feature that allows to check if a certain variable has value thats returns a Boolean value. We may use this functionality to avoid check some javascript values like null and undefinied, and it is simple to implement.
DialogsEngine.isNullOrEmpty(<value>);
Where:
value is a string literal that conforms a condition, property or value to be checked.
Returns:
true if the value has content, false otherwise, that is when does not have content, or its null or undefined.
DialogsEngine.isNullOrEmpty('value');
Enable/Disable selected data filter for Grid controls
DialogsEngine API allow to activate and disactivate the selected data filter of Grid controls. This method will be ignored for control of any other type.
DialogsEngine.filterSelection(<xrm_grid_control_name> , value );
Where:
xrm_grid_control_name is the name of the Grid control on which we want activate or deactivate the filter.
value Boolean value to activate or deactivate the filter.
DialogsEngine.filterSelection("MyGridControl",true);

Resume an unfinished previous Process
AgileXRM gives us the possibility of picking up a process inside our current form, needing a unique identifier. This is really useful for continuing unfinished processes that we need to work with and resume.
In order to perform this, this code should be added:
DialogsEngine.resume(<unique_identifier>);
Where:
unique_identifier, process identifier belonging to the actual process that we want to take over of, in our current flow.
Once set, we will continue through the recovered process in the exact point it was abandoned before.
Sava data explicity
By default, AgileDialgs saves all data when the “Next” button is clicked. However, sometimes we need to save the current data to continue with the work later.
DialogsEngine.saveDialogContext(<interval>, <callback>);
Where:
interval,optionalset the interval os time to save data. This value is mesured in miliseconds. Minimum value for this param is 1500.
callback,optionala function to execute when data is succesfully saved.
/* Saves AgileDialogs data explicity, single time */
DialogsEngine.saveDialogContext();
/* Saves AgileDialogs data each 5 seconds */
DialogsEngine.saveDialogContext(5000);
/* Saves AgileDialogs data explicity , single time and executes a callback function */
DialogsEngine.saveDialogContext(function (){
/* your code goes here*/
});
/* Saves AgileDialogs data each 5 seconds and executes a callback function */
DialogsEngine.saveDialogContext(5000, function (){
/* your code goes here*/
});
Define min a max values for Calendar control
AgileDialgos calendar controls can define a range of valid inputs by setting minimum and maximum values. These values can by set using DialogsEngine by this way:
DialogsEngine.setMinValue(<controlname>, <value>);
DialogsEngine.setMaxValue(<controlname>, <value>);
Where:
controlname, is the name of the control in which apply the expression.
value, its the value to set in controlname. Can be a valid ISO-8601 dateexpression or a date object.
/* set Min value */
DialogsEngine.setMaxValue("datetime_2", '2021-12-25T14:55:37Z');
/* set Min value */
DialogsEngine.setMinValue("datetime_2", '2021-12-25T14:55:37Z');
Also, DialogsEngine API defines methods to get the configured values for Min Value and Max Value
DialogsEngine.getMinValue(<controlname>);
DialogsEngine.getMaxValue(<controlname>);
Where:
controlname, is the name of the control to get the value.
By the same way, we can get thats values
/* Get Min value */
var min = DialogsEngine.getMinValue("datetime_2");
// Return a min date expressed as ISO-8601. Example: returns '2021-12-25T14:55:37Z'
/* Get Min value */
var min = DialogsEngine.getMaxValue("datetime_2");
// Return a min date expressed as ISO-8601. Example: returns '2021-12-25T14:55:37Z'
Deprecated functions
Subscribe to control value changes (Deprecated - Use addChangeEventHandler Instead)
In order to manage value changes in controls this code must be added:
// add change handler to control called textControl

function myChangeHandler (controlName,controlValue){
    if (controlName == "textControl"){
        //add your logic here
    }
}
fieldChangeHandler.addHandler(myChangeHandler);
myChangeHandler method will add a handler to be called when a control value is changed. The method added (in this example: myChangeHandler) will receive 2 parameters:
Where:
controlName: Name of the control to be validated.
controValue: Current value of the control.